This is the second part of a two-post series about creating a Web API REST service written in ASP.Net Core and consuming it using the NSwag toolchain to automatically generate the C# client code.
The first part described how to set up the service and now it’s time to consume it by generating an API client using NSwag.
Note: We can use this method to consume any REST API that exposes a service description (i.e. a “swagger file”), we’re not at all limited to .Net Web API services.
Example code is available on GitHub.
Generating clients
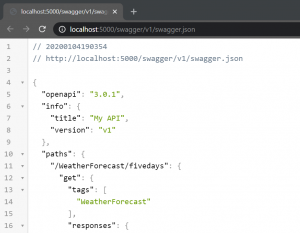
Once the service has a correct Swagger service description (the JSON file) we can start consuming the service by generating clients. There are several different tools for doing this and in this blog post I’ll use NSwag which is currently my favorite client generation tool as it’s very configurable and was built from the start for creating API clients for .Net.
NSwag has many options and can be used in two main ways:
- As a visual tool for Windows, called NSwagStudio
- As a command line tool, NSwag.exe, which is what I’ll describe here
NSwag.exe has many options so to make it easy to use it makes sense to create scripts that call the tool. The tool can also use saved definitions from NSwagStudio if that better suits your workflow, but I find it easier to just pass in all the options to NSwag.exe since it’s more transparent what settings are used.
Here’s how I currently use NSwag.exe to generate C# clients using a Powershell script:
function GenerateClient(
    $swaggerUrl,
    $apiNamespace,
    $apiName,
    $apiHelpersNamespace) {
    $apiHelpersNamespace = "${apiNamespace}.ApiHelpers"
    $clientFileName = "${apiName}Client.cs"
    $clientExtendedFileName = "${apiName}Client.Extended.cs"

    nswag openapi2csclient `
        "/Input:${swaggerUrl}" `
        "/Output:${clientFileName}" `
        "/Namespace:${apiNamespace}.${apiName}Api" `
        "/ClassName:${apiName}Client" `
        "/ClientBaseClass:${apiHelpersNamespace}.ApiClientBase" `
        "/GenerateClientInterfaces:true" `
        "/ConfigurationClass:${apiHelpersNamespace}.ApiConfiguration" `
        "/UseHttpClientCreationMethod:true" `
        "/InjectHttpClient:false" `
        "/UseHttpRequestMessageCreationMethod:false" `
        "/DateType:System.DateTime" `
        "/DateTimeType:System.DateTime" `
        "/GenerateExceptionClasses:false" `
        "/ExceptionClass:${apiHelpersNamespace}.ApiClientException"

    if ($LastExitCode) {
        write-host ""
        write-error "Client generation failed!"
    }
    else {
        write-host -foregroundcolor green "Updated API client: ${clientFileName}"

        if (-not (test-path $clientExtendedFileName)) {
            write-host ""
            write-host "Please create partial class '${clientExtendedFileName}' with overridden method to supply the service's base address:"
            write-host ""
            write-host -foregroundcolor yellow "`tprotected override Uri GetBaseAddress()"
            write-host ""
        }
    }
}

$apiName = 'Weather'
$swaggerUrl = 'http://localhost:5000/swagger/v1/swagger.json'
$apiNamespace = 'WebApiClientTestApp.Client'

GenerateClient $swaggerUrl $apiNamespace $apiName
I use the openapi2csclient generator (called swagger2csclient in previous NSwag versions) to create a C# class for calling the REST API, based on the swagger.json file for the service. Except for some obvious options for input and out paths, and class name and namespace, some of these options need a few words of explanation.
- /GenerateClientInterfaces is used to generate a C# interface so that the client class can easily be mocked when writing unit tests on classes that call the client.
- /ClientBaseClass is the name of a base class that the generated client class will inherit from. This is useful for collecting common code that should be performed for more than one API client, such as authentication, configuration or error handling. Depending on other options, this base class is expected to contain some predefined methods (see here for more details). This is an example of what the base class might look like:
public abstract class ApiClientBase
{
    protected readonly ApiConfiguration Configuration;

    protected ApiClientBase(ApiConfiguration configuration)
    {
        Configuration = configuration;
    }

    // Overridden by api client partial classes to set the base api url.
    protected abstract Uri GetBaseAddress();

    // Used if "/UseHttpClientCreationMethod:true /InjectHttpClient:false" when running nswag to generate api clients.
    protected async Task<HttpClient> CreateHttpClientAsync(CancellationToken cancellationToken)
    {
        var httpClient = new HttpClient {BaseAddress = GetBaseAddress()};
        return await Task.FromResult(httpClient);
    }
}
- /ConfigurationClass is the name of a class used to pass configuration data into Api client.
- /InjectHttpClient:false and /UseHttpClientCreationMethod:true are used to give the base class control of how the Http Client instance is created which can be useful for setting default headers, authentication etc.
- /DateType:System.DateTime and /DateTimeType:System.DateTime are used to create standard .Net
DateTimetypes for dates rather thanDateTimeOffsetwhich NSwag for some reason seems to default to. - /GenerateExceptionClasses:false and /ExceptionClass are used to stop exception types from being generated for the APi client. The generated client will treat all 4xx and 5xx HTTP status codes on responses as errors and will throw an exception when it sees them. By using these options we can control the exception type so that all our generated API clients use the same exception type will greatly will simplify error handling.
The generated C# client is marked as partial which allows us to manually create a small file for supplying information to the base class:
public partial class WeatherClient
{
  protected override Uri GetBaseAddress()
  {
    return new Uri(Configuration.WeatherApiBaseUrl);
  }
}
And that’s all we need to generate the clients with full control over the error handling, HTTP client creation. To generate the client, start the service and run the above script and the client C# class is automatically generated.
Test project
To test this out, get the example code from GitHub. The solution contains to projects:
- WebApiClientTestApp.Api – a service with an example endpoint
- WebApiClientTestApp.Client – a console app with a client that call the service
Starting first the Api project and then the Client project will print out the following in a command prompt:
Generating the client
To regenerate the client, first install NSwagStudio. Either the MSI installer or the Chocolatey installation method should be fine. Then start the Api project and open a Powershell prompt while the Api is running. Go to the Client project’s WeatherApi folder and type:
.\GenerateClient.ps1
The result should be something like this:
(If your output indicates an error you may have to run the Powershell as Administrator.)
The WeatherClient.cs file is now regenerated but unless the Api code is changed, the new version will be identical to the checked-in file. Try to delete it and regenerate it to see if it works.
The Powershell script can now be used every time the API is changed and the client needs to be updated.
Summary
By installing NSwagStudio and running the included console command nswag.exe, we are now able to generate an API client whenever we need to.
Note that the client generation described in this post is not limited to consuming .Net REST API:s, it can be used for any REST API that exposes service description files (swagger.json) properly, which makes this a very compelling pattern.
/Emil


